Rainbow Fidget Spinner
Introduction
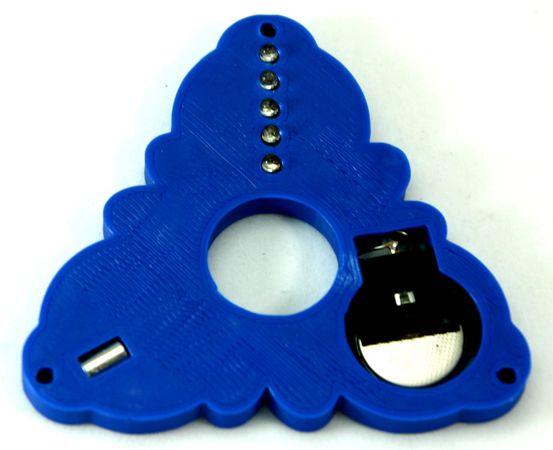
The Vorpal Rainbow Fidget Spinner is a fun project that allows you to make a 3D printed fidget spinner that lights up in a rainbow of random colors when you spin it. There is no on/off switch for this project, rather it uses a clever centrifugal force switch that automatically engages when the project is spinning. Even fairly slow spinning speeds will light up the spinner. Because this project is open source, you can modify the spinner design, remix, and hack the project to your heart's content.
This project is open source and is licensed under the Creative Commons Share-Alike Attribution International 4.0 license.
A convenient kit including all the electronics is available from the Vorpal Robotics Store.
Here's a short video. (The video actually does not do the project justice, because video recording frame effects make it seem like the colors are flickering, they're actually quite steady!)
Assembly Video
Teaching Tech is a great youtube channel with lots of good 3d printed projects, and they did a nice build video on this project. Please consider subscribing to their channel!
If the video does not play on your device (or you want full screen), go directly to YouTube with this link: TEACHING TECH RAINBOW FIDGET SPINNER BUILD VIDEO
Bill of Materials (BOM)
The following electrical and hardware items are required to build this project:
- 5 x Random color LEDs, T3 size (3mm)
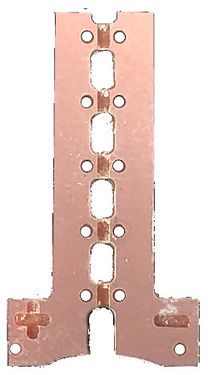
- 1 x Rainbow Fidget PCB*.
- 1 x Sorenson Centrifugal Force Switch, model RV-RUG-00-000-BB, 0.307" L x 0.213" W
- 1 x low profile CR2032 battery holder, half circle type
- 1 x CR2032 button cell battery (not rechargeable)
- 6 x Button head cap screws, M3x5mm
- about 8 inches (200mm) of bare hookup wire, anywhere from 21 to 24 gauge is fine.
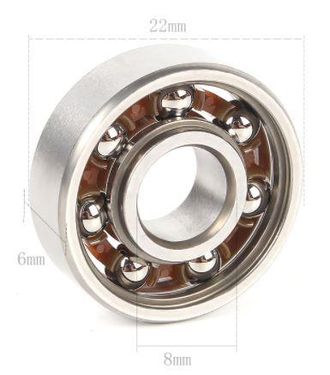
- 1 x Skate Bearing (size 608)
* NOTE for self-sourcers: Instead of making the Rainbow Fidget PCB, you can substitute a piece of copper clad perfboard, 0.1" spacing, 6 holes by 2 holes, carefully cut out of a larger PCB with a hacksaw.
The following 3D printed parts are needed for this project. You can find all of the STL files on Thingiverse by searching for Vorpal Rainbow Fidget Spinner. You can find the source 3D models on OnShape.com by searching for "Vorpal Rainbow Fidget Spinner". A DXF file for the PCB is also posted in a tab in the OnShape.com project.
- 1 x Circuit carrier
- 1 x Bottom Plate
- 1 x Top Plate
- 2 x Endcap
The following tools and supplies are needed:
- Hex key that fits the screws, this would be a 2mm hex key for 3mm button head screws. A 5/64 inch hex key will also work because that's very close to 2mm. (Included in our kit.)
- Soldering iron, solder (lead free is recommended), rosin flux paste or liquid, wire cutters
Assembly Steps
Test LEDs
The button cell battery has enough internal resistance that no resistor is needed with the LED. This means you can test each LED before soldering it in place by simply touching the long leg to the (+) side of the coin cell battery included in the kit and the short leg to the (-) side. The LED should light up in a variety of colors. Each kit comes with a spare LED, so you just need to find 5 good ones (in almost all cases all six will work.)
Solder LEDs and Wires to Printed Circuit Board
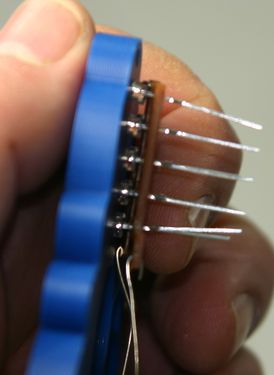
The printed circuit board (PCB) has a side with copper and a side without copper. The LEDs should be inserted into the holes from the non-copper side. Each LED has a short lead and a long lead. The long lead of each LED should be inserted such that they come out through the side of the board marked with a + sign. The two holes that are farther apart, near the + and - symbols, are not for LEDs but rather for pieces of wire. Place the end of a 3 inch piece of wire in each hole.
To hold all the LEDs straight while soldering, you can use the circuit carrier 3D printed part. Use the side that doesn't have the deep grooves to hold the LEDs in place.
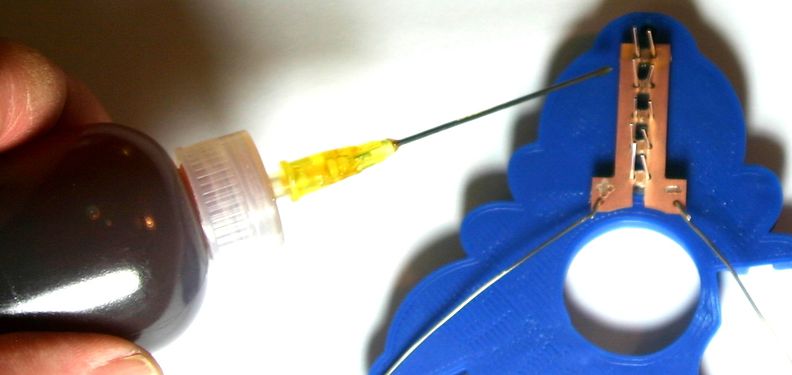
Once they are set down, double check to make sure all of the long leads are on the + side of the board. Apply a little rosin flux then solder all the connections. It's very important not to bridge the solder between the + and - sides of the board, which are separated by a gap in the copper.
You may now test the LEDs by taking the CR2032 battery and touching the wire on the + side of the circuit to the battery side marked +, then touch the other wire on the other side. All LEDs should light up. If some or all of them do not light up, you may have reversed the short vs. long legs of the LED, or the solder joints may not be good. Carefully check the joints to rule out soldering. To check for reversed wiring, connect the wires to the battery the opposite way and see if the LEDs that fail to light now light up. If they do, you did not orient the LEDs properly and you would need to desolder them and flip them around.
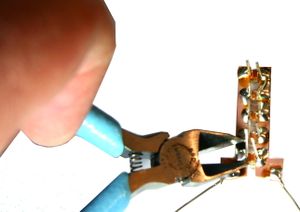
Once everything works, carefully trim off the excess LED leads.
Solder the Centrifugal Force (CF) Switch
The centrifugal force switch will turn on the lights only when the spinner rotates at a certain minimum angular velocity.
One contact is the small wire coming off one side, the other contact is the drum shaped body of the switch. The switch is somewhat more difficult to solder than the LEDs and plain wires. Rosin flux should be applied and you may need to hold the soldering iron on the metal for a longer period to make everything stick. Don't worry, the solder will start to flow. The switch is not a sensitive electronic component so it can take more heat than the LEDs or other circuitry.
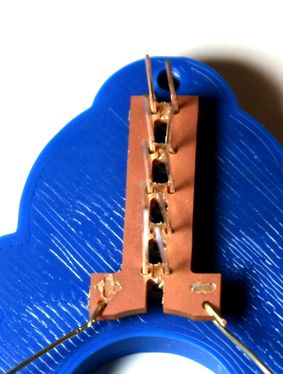
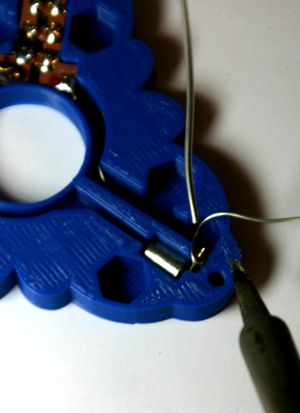
Twist the end of the wire coming from the - side of the PCB around the stiff wire coming off the CF switch. Don't get too close to the body of the switch, because if you bridge the wire and the body then the switch will always be "on". Apply rosin flux and solder.
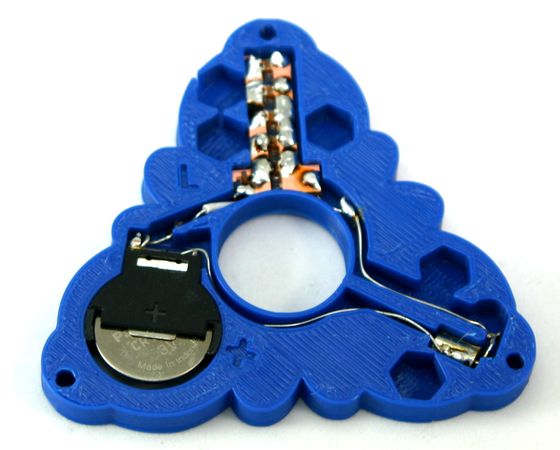
Insert the CF switch in the 3D printed circuit carrier. The wire side should be facing away from the center of the Fidget Spinner as shown. Route the wire from the - side of the PCB to the CF switch in the groove provided for this purpose.
Lay the end of a 3 inch long piece of wire on the body of the CF switch, and apply some rosin flux, and solder. After removing the soldering iron don't move the CF switch for a few seconds to let the solder set.
Solder the Battery Holder
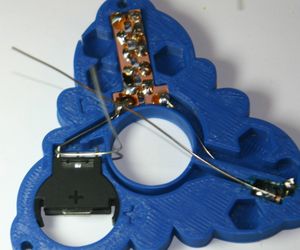
The battery holder has a + one one side and three terminals. Place the battery holder into the circuit carrier as shown in the picture below, with the + side on the same side of the carrier as the PCB.
The two outer terminals on the battery holder are both the + side of the battery, and the center terminal is the - side of the battery. You do not need the + terminal that's closest to the skate bearing, cut it off with angle cutters (this reduces the chances of a short circuit).
Route the wire attached to the body of the CF switch to the center terminal of the battery holder and wrap it around the terminal. Needle nose pliers might make it easier to get a tight wrap. Apply some rosin flux and solder. It may be easier to solder from the back side of the circuit carrier (the side where the LEDs are poking through the plastic). Trim off excess wire with angle cutters.
Test the Circuit
You can now test the circuit without even spinning by touching a piece of scrap wire across the CF switch. Join the wire stem to the body using the scrap of wire and the LEDs should all light up.
If some or all of the LEDs do not light up, trace the wiring and check solder connections to make sure everything is solid.
Insert the Skate Bearing And Balance Weights (Nuts)
The skate bearing can be pressed firmly into the center hole of the circuit carrier. It should be tight and not fall out, but be reasonably easy to press in using pressure against a table. If it's too tight, a little sandpaper work on the hole should do the trick. If too loose (could happen if your printer is under-extruding) then a drop or two of super glue should solve the problem.
Each of the hexagonal cavities in the circuit carrier gets one #6 nut. These provide counterweights to make the spinner balance better.
Screw the Housing Together and Insert The End Caps
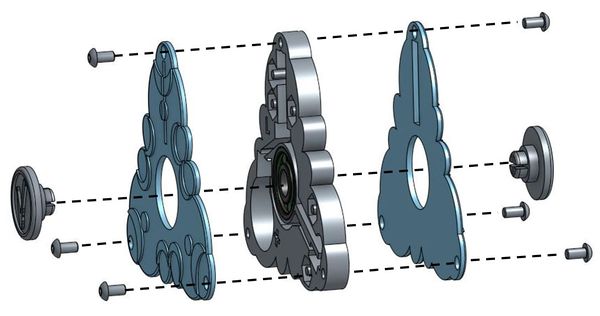
Each face place requires three small screws, M3 x 5mm long. Each one will go about halfway through the circuit carrier. The kit comes with the right screws and the required 2mm hex key to tighten them.
Do not overtighten! Once the head of the screw meets the plastic, stop tightening. If you overtighten, you'll strip the plastic and the screws won't hold well after that. If that happens, a drop of glue can recover the situation.
Depending on your printer settings, it is possible for a hole to be a little too big for the screw. (For example the printer may slightly under-extrude). If this happens, a drop of glue in the hole should clear things up by making the hole a little smaller. Put in the drop of glue and screws, hold it tight with some rubber bands until the glue dries.
Finally, insert the end caps into the skate bearing. These allow you to grip the spinner better.
You may also optionally decorate the Rainbow Fidget Spinner by using an oil marker to outline the Vorpal "V" symbol on the end caps and/or the raised curved shapes on the top and bottom plates.
Have Fun!
The rainbow fidget spinner will light up when it turns approximately 2.5 to 3 revolutions per second. It is not at all hard to make a fidget spinner go faster than that.
This spinner is perfect for use with Vorpal the Hexapod's "Fidget Spinner Challenge". If you use it, you should add a new rule: The spinner must light up for the challenge to be completed.
